Mold Techniques
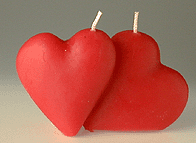 It is no secret that the candle market is flooded with container and jar candles. This is a logical progression because these types of candles are easy to make, smell great, and are relatively easy to maintain multiple brands using different labels. Every candle maker is faced with the challenge of creating more revenue for various reasons whether it is at the crafting level to fuel their hobby, or a manufacturer that needs to pay next week’s payroll. One way to bring in new customers and increase sales is to offer new and unique candles that are not offered by you competition. This can easily be achieved by learning how to make freestanding or pillar candles using a variety of mold techniques. According to the National Candle Association, candle users say they most frequently burn candles in the living room (42%), followed by the kitchen (18%) and the bedroom (13%). One may assume that aesthetics are important in the living room and creating beautifully unique pillars that burn cleanly could be a great way to increase sales. The following tips and tricks should help you with increasing your freestanding candle offering.
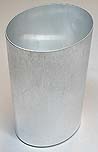
- Aluminum molds are heat resistant, durable, and leave no ugly seams in the finished candle. Finished candles are professional looking and have an extremely smooth finish.
- Pillar Pins are a great way to increase production while maintaining perfectly straight wicks. Once mastered they are a necessity for making pillars efficiently.
- If you are using rubber plugs to seal the wick hole, place molds on two parallel strips of wood or other material that allows you to keep molds level.
- Adjust pouring temperature to achieve different effects. If candles are not de-molding easily, try raising pour temperature a bit.
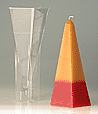
Polyurethane Molds
- Leave an extra few feet of wick coming from the bottom of the mold. This way fresh wick comes up through the wick hole when you remove the finished candle, thus eliminating the need to push wick through the tiny hole for the next candle.
- You can carefully trim the mold down the sides or where needed with a sharp razor blade.
- Rub a very small amount of petrolatum on the seam to help smooth seams. While you are rubbing the petrolatum on the seam, use the opportunity to verify you have the mold correctly lined up.
- Use picture wire or a D-string from a mandolin to help you wick the mold the same way you would thread a needle.
- Be sure to use the correct wax designed for free standing candles. If you use the wrong wax or incorrect temperature, it can be tricky getting the mold cleaned out.
- Do not pour wax into the mold if it is over 200 degrees or damage to the mold may occur.
- A mold rack (part # DSM-100) can be used to hold the polycarbonate molds at different angles to make unique stripes on the finished candle.